")
How to Temper Chocolate (And Why)
Posted by Nicole Tait on 17th Mar 2023
Tempering chocolate is a process of heating and cooling chocolate to stabilise its structure, giving it a smooth, glossy finish and a crisp snap when broken. Tempered chocolate is ideal for making chocolates, coating truffles, or decorating desserts. Here we discuss the steps to temper chocolate and the importance of the process.

Why is it important to temper chocolate?
Chocolate contains cocoa butter, which is a type of fat that has a crystalline structure. When chocolate is melted, the cocoa butter crystals become disorganised and can create a dull or grainy texture when it solidifies again. Tempering chocolate allows the cocoa butter crystals to form in a specific way, resulting in a smooth, shiny finish and a crisp texture.
How to temper chocolate
There are several methods for tempering chocolate, including the seeding method, the tabling method, and the microwave method. We are going to focus on the seeding method, which is the most commonly used method.
You will need:
Chocolate (use good quality chocolate for best results)
A heatproof bowl
A thermometer
A silicone spatula
A baking tray lined with parchment (baking) paper - try our reusableMore Cookie Liners
A clean, dry surface for spreading the chocolate
Step 1: Melt the chocolate
Chop the chocolate into small, even pieces and place them in a heatproof bowl. Heat the bowl over a *double boiler or in the microwave in short bursts, stirring frequently, until the chocolate is melted and reaches a temperature of about 46°C (115°F) for dark chocolate or 43°C (110°F) for milk or white chocolate.
*double boiler is a bowl or pot over a larger pot of simmering water. You can use a heatproof mixing bowl on top of a pot of simmering water. Be sure that there is space between the mixing bowl and the simmering water. The bowl shouldn't be touching the water.

Step 2: Add the seed chocolate
Remove the bowl from the heat source and add about 1/4 to 1/3 of the total amount of chocolate you are using in the form of small pieces (called seed chocolate) to the melted chocolate. Stir the chocolate gently with a silicone spatula until the seed chocolate is melted and the temperature drops to about 27°C (81°F) for dark chocolate or 26°C (78°F) for milk or white chocolate.
Step 3: Heat the chocolate again
Place the bowl back over the double boiler or in the microwave and heat it in short bursts, stirring frequently, until the temperature reaches about 31°C (88°F) for dark chocolate or 29°C (84°F) for milk or white chocolate.
Step 4: Test the chocolate
To test if the chocolate is tempered, dip the tip of a knife or a spatula into the chocolate and place it in the refrigerator for a few minutes. If the chocolate hardens quickly and has a shiny finish, it is tempered. If it is dull, streaky, or takes a long time to harden, it is not tempered and you will need to repeat the process.
Step 5: Use the tempered chocolate
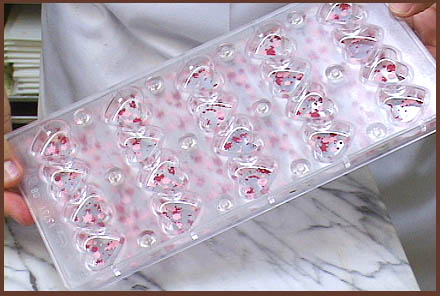
Once the chocolate is tempered, it can be used with magnetic chocolate moulds, silicone stencils and chocolate transfer sheets, the possibilities are endless.
For shards, bark or curls spread the tempered chocolate in a thin layer on the parchment (baking) paper-lined tray and let it harden at room temperature or in the refrigerator.
You can also print your own design onto chocolate transfer sheets to create decorative chocolate bark, shards, curls, shapes or toppers. To do so place your chocolate transfer sheet printed side up on a large flat baking tray lined with baking paper or a silicone baking sheet.

Credit: Little Dot Chocolate
Spread the tempered chocolate all over the transfer sheet in an even thickness. Gently tap the tray against your bench to remove any air bubbles from the chocolate. Allow to set slightly before scoring or forming into required shapes, and then set fully in the fridge.

Tempering chocolate may seem like a daunting task, but with a little practice, it can be a rewarding and enjoyable process. By following the steps outlined in this blog, you can achieve perfectly tempered chocolate that will make your desserts look and taste amazing. So, next time you want to impress your friends or family with your chocolate-making skills, give tempering a try