
EIS Icing Cutter Pro - Perfect Rounds Every Time
26th Feb 2022
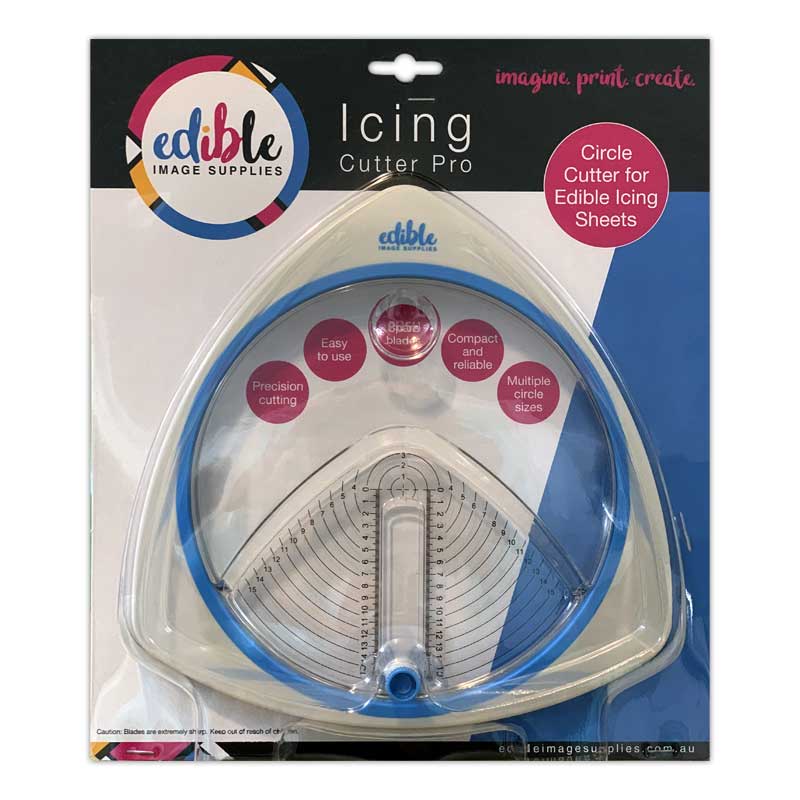
Keen to cut perfect rounds in various sizes every time? Yes? Then you need to get your caking hands our EIS Icing Cutter Pro!
The Icing Cutter Pro has saved many a caker/bakers hand from repetitive scissor-use strain. It’s simple to use, adjustable to suit the sizes you need from 1" (2.4cm) - 6" (15.3cm) in diameter and will help cut through your icing sheets and fondant to produce perfect round disks in the flick of a wrist.
How does it work you ask? Well, it is as simple as 1, 2,…..7!
Firstly - purchase an EIS Icing Cutter pro from our online store, then:
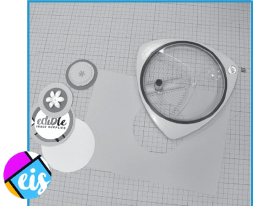
1. Layout your fondant or icing sheet on a flat surface (we recommend a cutting mat) and place the cutter over the fondant or icing sheet ensuring all 3 points are level.
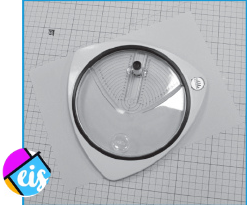
2. Line up the centre of your circle with the centre point of the cutter.
3. Loosen the position locker (blade shaft) to the diameter you require (the outer edge of your desired circle).
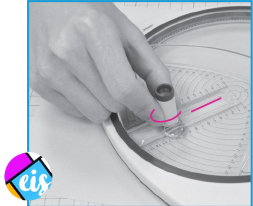
4. Rotate the adjustment cap to move the blade to the desired depth (to cut through the thickness of fondant or icing sheet).
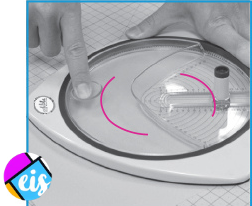
5. Firmly hold the cutter in place (ensuring all 3 points are level) and move the rotator by pressing on the indent and moving the rotator 360 degrees around (a full rotation).
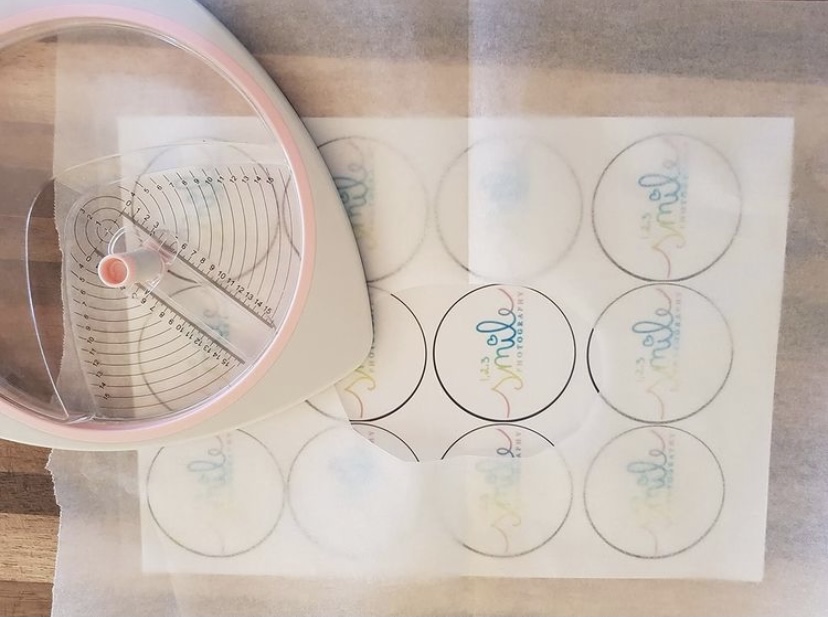
6. Once cutting is completed carefully lift off the cutter and rotate the blade inside the cutting unit for safe storage.
Clean any ink/residue off the base of cutter.
TIP: We recommend practicing on a plain paper first to acquaint yourself with the cutter.
The EIS Icing Cutter Pro comes with spare blades. It can also be purchased as part of a Cutting Toolkit, which contains the Cutter, an A3 self-healing cutting mat and a craft knife for freehand cutting.
TIP: “Use a sheet of clean baking paper with an oval hole cut out of the paper a bit larger than the image you are cutting. This allows the cutter to glide over the images easily. It prevents residue and ink from sticking to the bottom of the cutter (keeping it clean), which in turn protects your images from the transfer of any potential marks.” - Janifer Hutchinson (cuts hundreds of icing images a month, so she knows all the tricks), @janifersediblecaketoppers.