
Lets Talk About Edible Icing Sheets
22nd Feb 2022
Most cake or cookie decorators at some stage will use edible images to finish off a design, customise a cake to a specific theme or even to display a corporate logo. If you are already using or producing your own edible images in your creations, you know just how effective they can be. You’d also know how easy they are to use and how much time they can save. Although edible images have come a long way, many people are still uncertain or timid to use them in their regular designs. In previous blogs we’ve discussed edible ink and edible ink printers, so here to round off the final component of an edible image we’re discussing edible icing sheets and their application.
Edible icing sheets, put simply, are just thin layers of icing that have been applied to a flexible plastic backing sheet. The backing sheet allows the icing sheet to be fed through an edible ink printer, just like a normal piece of paper, using edible image software to produce an edible ink image. If you use superior quality white icing sheets in conjunction with high quality edible ink, your image will be clear and vibrant. Once printed your icing sheet needs to be left to completely dry before using it or storing it away for use later. This will take approximately 20 minutes, maybe longer if humidity levels are high
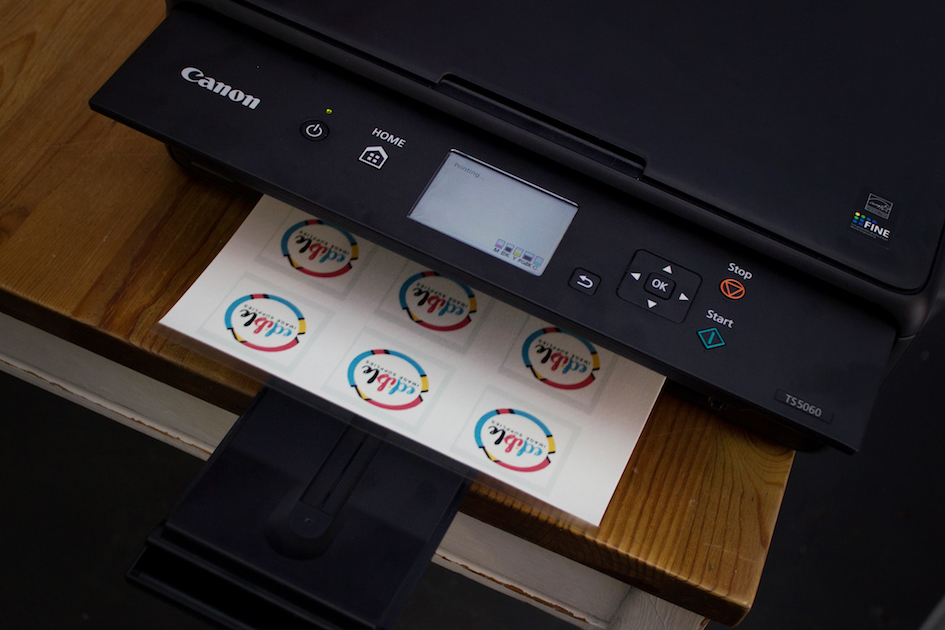
Printing on Edible Icing Sheet
Designed to blend with most icing finishes, within a few hours your edible icing sheet will meld into the surface and look like the picture has been printed onto the icing surface, also incorporating with the flavour of that surface. Be warned, not all brands are the same and some icing sheets have an obvious and unpleasant taste. Our EIS icing sheets have a subtle vanilla taste which blends well with all icing finishes.
If you follow a few simple rules when applying your edible images, you’ll continually achieve your desired result. Always handle your printed icing sheets with care, using clean dry hands or food safe gloves. If you need to cut your edible image, do so while it is still on the backing sheet. Cutting icing sheets is just like cutting a piece of paper. You can use several cutting utensils such as scissors, a craft knife/scalpel, Icing Cutter Pro, or paper punches. Like anything, using sharp tools will ensure clean lines and no tears. You can also tear the icing sheet if you are after a torn-paper effect.
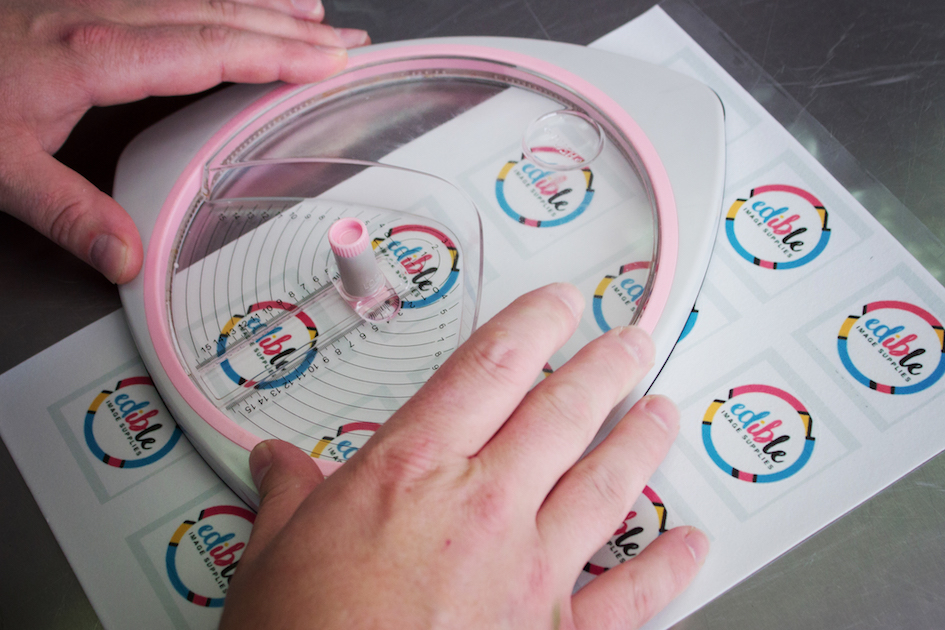
EIS Icing Cutter Pro
The beauty of the plastic backing sheet is that it not only allows the icing sheet to be fed through a printer, you can also use it to trace or hand draw an image or design on the reverse of your printed sheet as a guide for cutting. As you are marking the plastic side you do not end up with guidelines on your display piece. NOTE: Remember to mirror (or flip) your image before tracing/drawing it onto the plastic backing of the icing sheet if you want it to align a certain way on your creation. As you are cutting your image from the back side of the sheet, any image will show up in the reverse once it has been applied. This is especially important if you have any text you want to cut out. Always take care not to damage your printed image when working with the icing sheet face down.
Edible icing sheets are extremely versatile as they can be applied to most icing finishes including buttercream, fondant, royal icing, marzipan, ice cream and chocolate. If you are applying a full image to a surface such as a cake top, firstly ensure the surface is as level as possible. Then lower the icing sheet onto the topping, starting at the middle and working outward, gently smooth using your hands or a small roller. If air bubbles appear, just pop with a fine needle. If your icing surface is dry, a fine spray mist of water, will help the icing sheet adhere.
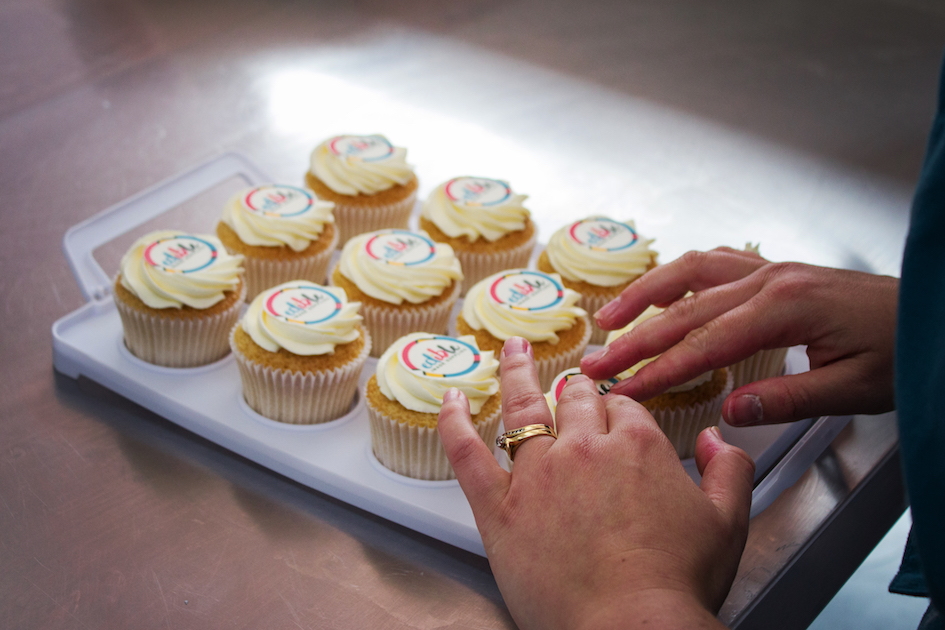
Careful application
It is recommended not to place icing sheets directly onto whipped cream due to its high moisture content, which will be absorbed by the icing sheet and impact the quality of the image. If you wish to apply the edible image to whipped cream, apply to a thin layer of fondant or white chocolate first, to act as a barrier between the cream and the icing sheet.
Small edible images and details such as lettering can be applied just like a sticker. Currently popular are large printed designs used to wrap around an entire cake. This simple application is incredibly visually effective. Always apply your icing sheet wrap slowly, from one end at a time, to avoid bubbles from forming under the icing sheet.
Like any printed image, to achieve the best result with your icing sheet image you need use quality products and start with a clear, high-resolution image. You also need to store your blank and or printed icing sheets correctly and in accordance to use by dates. Reputable suppliers will provide clear instructions on how to do this. When sourcing your edible icing sheets ensure that an ingredient sheet for the product is available.
Most importantly when it comes to using edible icing images, just enjoy playing around with them, your designs and all the possibilities they offer for your creations.
* Edible Image Supplies icing sheets are available in A3, A4 and pre-cut sizes. They can easily be cut into various sized rounds with our Icing Cutter Pro.