8 Essentials for Edible Printing Success
22nd Feb 2022

As many cake decorators and treat makers have already discovered the benefits of adding edible images to their cache of sweet creations are numerous. Edible images allow you to customise designs quickly and professionally for private and corporate clients. They save time, allow quick turn arounds, large production runs and can make for more affordable options for your customers. Edible images are easy to produce and use, so are great for beginners through to professionals. You can even start your own stand alone edible image business very inexpensively!
In order to produce high-quality edible images you do need to be using quality products, and there are a few additional handy tools and tips to help when applying them to your desired sweet treat surface.
Here we list those items along with some handy tips from a few of our customers who use edible images on a regular basis:
1. A dedicated edible ink compatible printer. Whilst it’s great to be price conscious and look at various options with edible ink printers (and we recommend that you do), a word of advice if you’re looking for an easy, stress-free purchase with additional support, then a respected supplier who specialises in edible printing equipment is your best bet. Currently, Canon printers are our preferred machines for edible printing. We love their controlled microscopic ink ejection from the printhead nozzles, which delivers great precision prints.
Important Note: For edible images NEVER use a printer which has previously been used with non-edible inks.
“My biggest tip is to make sure you do regular maintenance on your printer, not only the printer head and cartridges but also make sure your rollers are clean especially if you have been printing a lot of black or solid colours”. Janifer Hutchinson - Janifer’s Edible Cake Toppers
2. Quality edible ink. This ink is decanted into food safe edible ink cartridges which work just like regular ink cartridges, except they are safe for human consumption. They are used in edible ink printers that are solely dedicated to producing edible images.
Ensure the edible ink you are purchasing is compatible with your printer. Different brands require different ink viscosity. And, just like printers, edible inks vary in quality. Invariably one of the best indicators of ink quality is usually the price. Be warned - poor quality ink will not only give you inferior prints with incorrect colours, it will also clog your printhead and possibly ruin your printer.
3. Edible icing sheets. Icing sheets are thin layers of icing which have been applied to a flexible plastic backing sheet. The backing sheet allows the icing sheet to be fed through an edible ink printer, just like a normal piece of paper. Edible icing sheets are extremely versatile as they can be applied to most icing finishes including buttercream, fondant, royal icing, marzipan, ice cream and chocolate. If you use superior quality white icing sheets in conjunction with high-quality edible ink, your image will be clear and vibrant.
Edible Image Supplies icing sheets are available in A3, A4 and pre-cut sizes.
4. Chocolate Transfer Sheets. These sheets are thin, food safe, plastic sheets, which have been coated with a cacao-butter product. They are designed specifically for use in a dedicated edible ink printer. When fed through the printer the printed image/design melds with the cacao butter coating. On contact with melted chocolate, the cacao butter pattern is transferred to the surface of the chocolate.
![]()
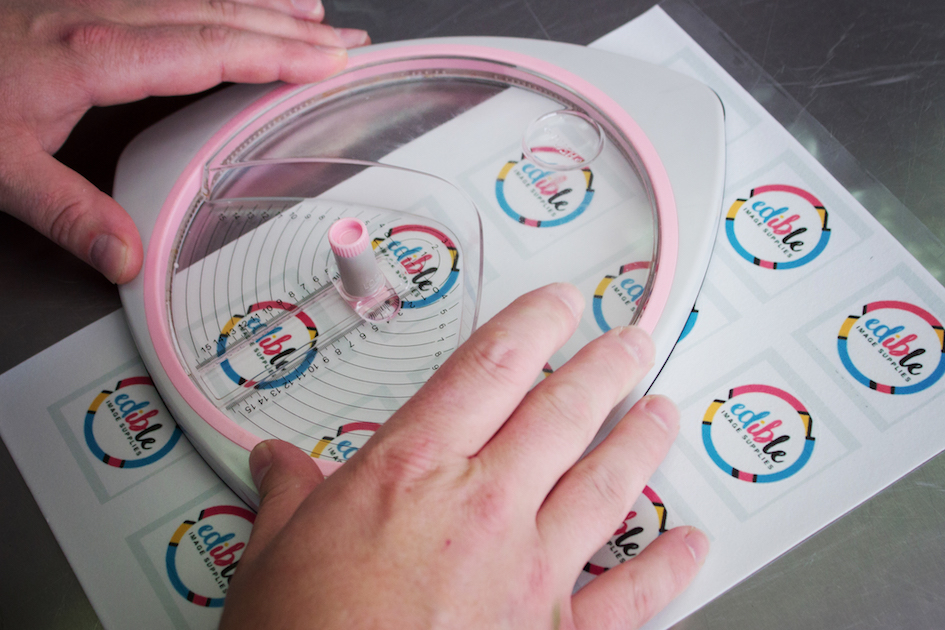
5. Cutting Tools. Cutting icing sheets is just like cutting a piece of paper. You can use several cutting utensils such as scissors, a craft knife/scalpel or paper punches. One of the handiest cutting tools available is the EIS Icing Cutter Pro which allows you to create perfect round circles quickly and precisely - excellent for large batch jobs. Like anything, using sharp tools will ensure clean lines and no tears. You can also tear the icing sheet if you are after a torn-paper effect.
“Our best tool would probably be our ganaching lids and scraper - they make it so easy to get straight/ sharp edges on our cakes. When it comes to our edible images though we would definitely say the Icing Cutter Pro! It makes cutting our toppers out quick & easy!” Jaime & Renee - The Little Treat Boutique
6. Software. You don’t need to be a design or computer whiz to print your edible images. You can pretty much print your desired edible image from any image software program or app. If you’d prefer a dedicated image program you could try our Icing Artist edible image dedicated printing and design software.
7. Application. If you follow a few simple rules when applying your edible images, you’ll continually achieve your desired result. Always handle your printed icing sheets with care, using clean dry hands or food-safe gloves. If you need to cut your edible image, do so while it is still on the backing sheet. For more information on application, we recommend you visit our Edible Tips blogs and FAQ’s.
“Allow your printed edible images plenty of time to dry. I find CMC or Tylose powder also help. For a topper, wire in advance and allow to set. For cake application, put on fondant backing first. Use a tiny spray mist of water or sugar glue to apply”. Kyla Daniels - Cakes By Kyla
8. Some extra tools that will help you achieve the finish you require are: ganaching lids and offset spatula for sharp edges on cakes and icing finishes. A paintbrush or atomiser for applying a thin layer of water or gel to the back of your sheets before application. An acupuncture needle to remove air bubbles.
“We find that using a thin layer of piping gel is the best way to adhere images to fondant and buttercream. It also helps to avoid any of the annoying little air bubbles that can occur under the image”. Tanja Kober - Choice Cakes